Heidenhain TNC Connectivity
Heidenhain TNC controls connect one of two ways, and the control generation decides which. The iTNC 530 and TNC 530 use the Heidenhain proprietary connector and need no licensed option. Everything newer — TNC 640, TNC 730 and TNC7 — should connect over OPC-UA using Option 56.
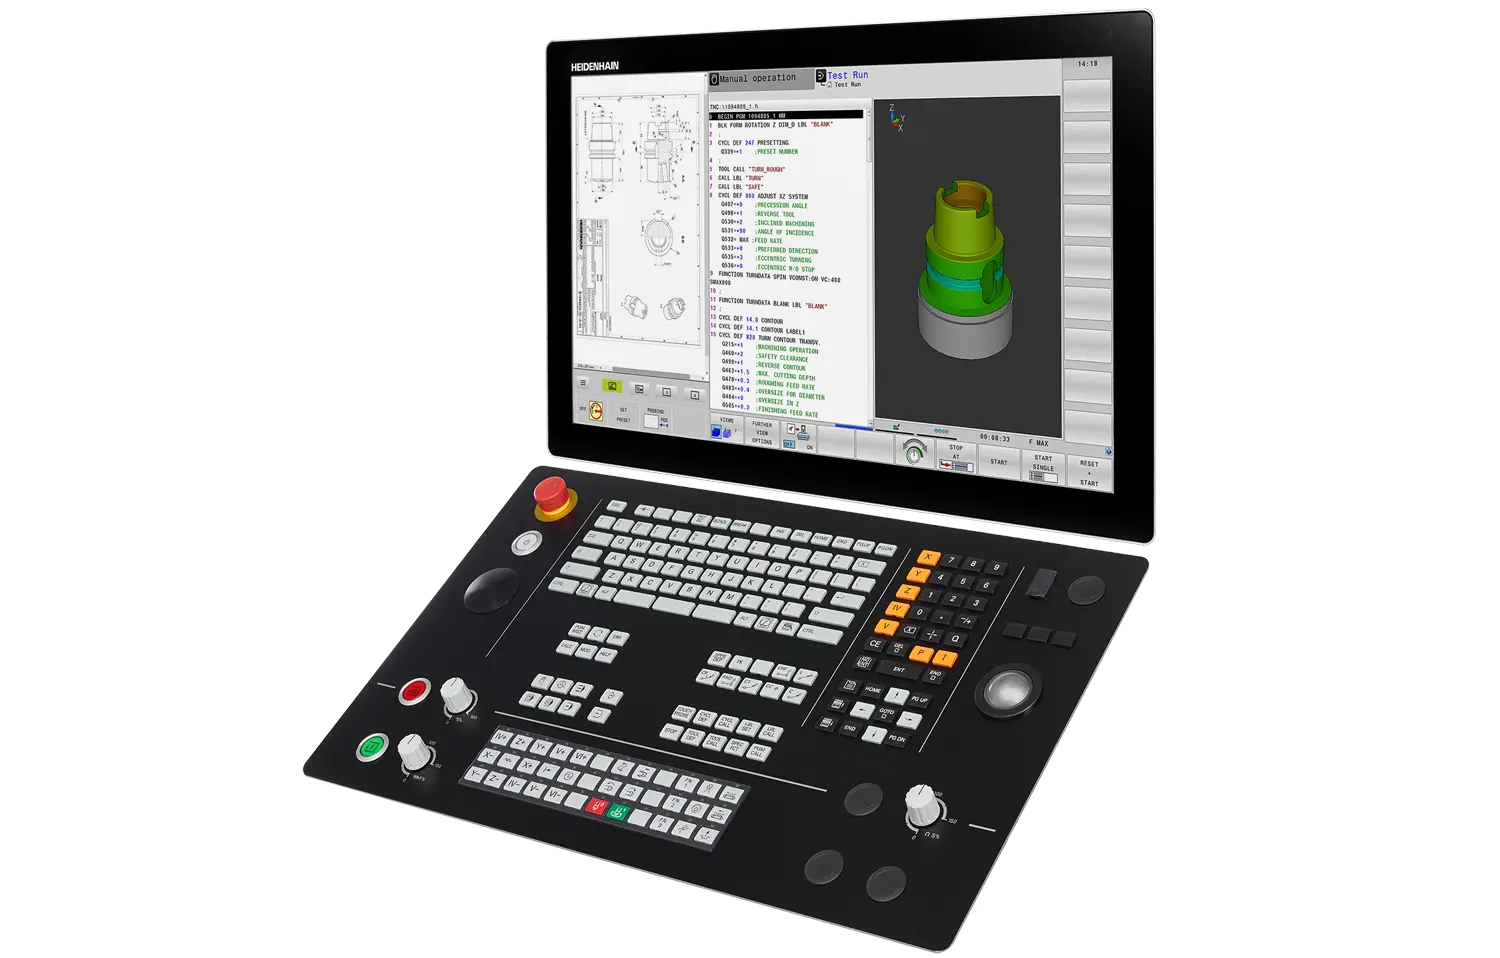
Heidenhain TNC control panel. A TNC 530 connects over the Heidenhain proprietary Ethernet protocol; a TNC 640, TNC 730 or TNC7 connects over OPC-UA with Option 56.
Either way the connection is Ethernet straight to the control, with no extra hardware, and either way you get real-time machine status, program and tool data, and part counts.
Key Features:
- Direct Ethernet communication — no gateway or converter
- Real-time machine status and production data
- Part count from the PLC WORD table on a TNC 530, or directly over OPC-UA on newer controls
- Covers iTNC 530 / TNC 530, TNC 640, TNC 730 and TNC7
- No additional hardware required
Which Control Do You Have?
| Control | Connection | Option needed | Setup |
|---|---|---|---|
| iTNC 530 / TNC 530 | Heidenhain proprietary connector | None | TNC 530 |
| TNC 640 | OPC-UA | Option 56 | TNC 640 / TNC7 |
| TNC 730 | OPC-UA | Option 56 | TNC 640 / TNC7 |
| TNC7 | OPC-UA | Option 56 | TNC 640 / TNC7 |
On anything newer than a TNC 530, connect over OPC-UA. Option 56 gives better data quality, more complete data access and part counting that works without mapping PLC addresses by hand. Heidenhain offers a 90-day free trial — contact Heidenhain directly, not MachineMetrics, to request it.
Option 18, the older proprietary Ethernet option, is a fallback only. It still requires the PLC WORD mapping described on the TNC 530 page, and if you are buying an option anyway there is no reason to choose it over Option 56.
Checking Installed Options (SIK Page)
To verify which options are installed on your control:
For iTNC 530 / TNC 530:
-
Power on the control and let it boot fully
-
Press the Programming and Editing operating mode softkey (right-arrow icon at the top-right of the softkey panel)

-
Press the MOD key

-
Press MOD again → navigate to Machine parameters / Diagnosis (menu wording varies by software version)
-
Choose Option management or Software options
-
Cursor into the input field and type SIK on the keyboard
-
Press ENT
For TNC 640 / TNC 730:
- Power on the control and let it boot fully
- Press the Programming and Editing operating mode softkey (right-arrow icon)
- Press the MOD key
- Press MOD again → navigate to Machine parameters / Diagnosis (menu wording varies)
- Choose Option management or Software options
- Cursor into the input field and type SIK on the keyboard
- Press ENT
You'll see the SIK page listing installed options and license status (Option 18, Option 56, etc.).
What to Look For:
- Option 56 (OPC-UA) - ✅ Recommended for TNC 640/730 (better data quality)
- Option 18 - ⚠️ Alternative connectivity option
- Check the license status shows as active/enabled
Notes:
- You typically need service-level access or higher to enter or change SIK codes; viewing may be allowed at lower access levels
- On some builds, step 3 is labeled Diagnosis → Software options instead of machine parameters
- If typing SIK does nothing, you're either in the wrong menu depth or logged in with insufficient access rights
- A keyboard is required - softkeys alone won't expose the SIK field
Prerequisites
Before beginning setup, ensure you have:
Hardware Requirements:
- Heidenhain iTNC 530 / TNC 530, TNC 640, or TNC 730 control
- Ethernet port on the control:
- iTNC 530 / TNC 530: Standard (no option required)
- TNC 640 / TNC 730: Requires connectivity option
- Recommended: OPC-UA Option 56 (better data quality)
- Alternative: Option 18 (if Option 56 unavailable)
- Network cable (Cat5e or Cat6)
- MachineMetrics Edge device on the same network
💡 Tip: For TNC 640/730, request a 90-day free trial of Option 56 from Heidenhain before purchasing.
Network Requirements:
- Available IP address on company network (static or DHCP)
- Network switch or router with available port
- Access to control's network configuration menu
- Ping access between Edge device and machine
Access Requirements:
- Physical access to the machine control
- Knowledge of machine's network configuration (if applicable)
- Administrator or operator password (if password protection enabled)
In This Section
| Page | What it covers |
|---|---|
| TNC 640 / TNC7 | The recommended path — network setup, OPC-UA Option 56, the information model, a full adapter script and part count |
| TNC 530 | iTNC 530 and TNC 530 — network setup, the proprietary connector, PLC data items and part count from the PLC WORD table |
| Troubleshooting | Connection, data collection, part counting and network faults |
Additional Resources
MachineMetrics Resources:
- Machine Settings Guide - Configure machine settings and data mapping
- Connectivity Overview - Compare connectivity methods
- Network Requirements - Firewall and network configuration
Heidenhain Resources:
- HEIDENHAIN OPC UA NC Server - Product page for Option 56 (OPC-UA connectivity)
- HEIDENHAIN OPC UA Information Model — download the current Information Model PDF for Table 2 (Core Information Model vs. minimum NC software) and node definitions
- Heidenhain TNC User Manual (consult your specific control model)
- Heidenhain PLC Programming Manual
- Machine builder documentation (Hermle, DMG Mori, etc.)
Related Guides:
- OPC-UA Connectivity Guide — add OPC-UA machines, security, and adapter scripts in MachineMetrics
- Edge Device Setup - Configure MachineMetrics Edge
- Adapter Scripts - Advanced data transformation
Getting Help
MachineMetrics Support:
- Email: MachineMetrics Support
- Phone: 844-822-0664
Saving a Service File from the Control
When contacting support, Heidenhain (or MachineMetrics support) may ask for a service file — a ZIP archive exported directly from the control that contains NC programs, tool data, PLC state, and logs. The symbol.lst file inside the archive is particularly useful for identifying PLC WORD addresses on your specific machine.
Step 1: Press the ERR key
Press the ERR key on the physical keyboard to open the error/log menu.

Step 2: Press LOG FILES

Step 3: Press SAVE SERVICE FILES

Step 4: Confirm and save
A dialog will appear. Confirm the filename (default: service) and press OK.
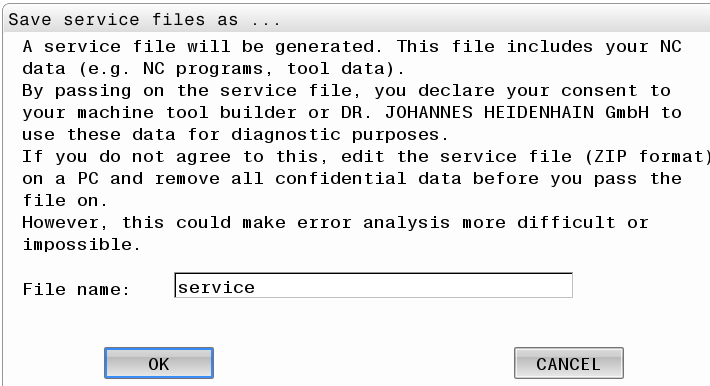
Step 5: Locate the ZIP file
Navigate to PGM MGT → TNC:\service\. The service ZIP file (e.g., service-20240223-105005.zip) will appear in this folder.
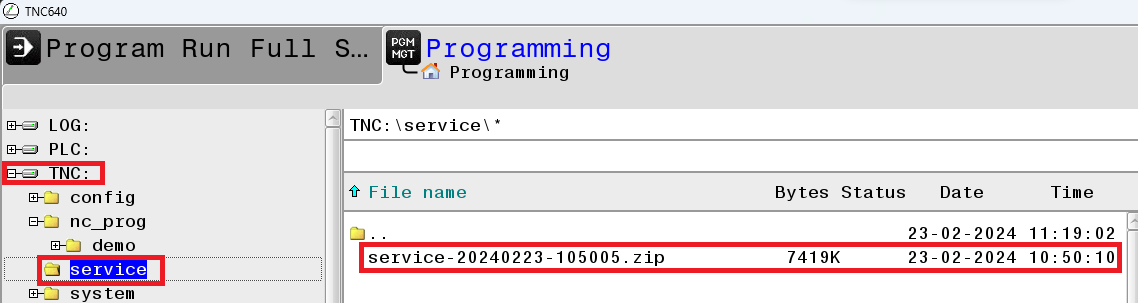
Step 6: Copy the file to a USB drive
Select the ZIP file, press the COPY softkey, then use the folder-browse softkey to select your USB drive as the destination.

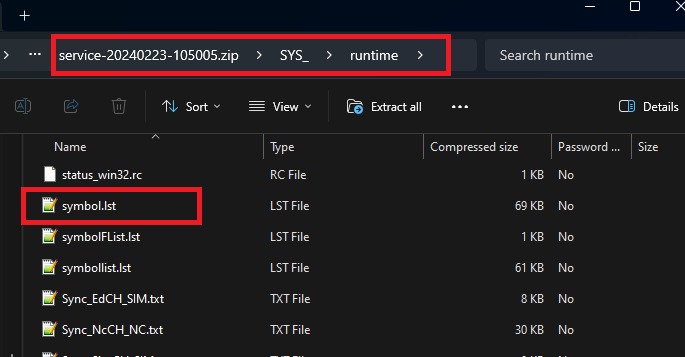
Step 7: Extract and locate symbol.lst
On your PC, extract the ZIP. Inside the SYS_\runtime\ path you will find symbol.lst — this file maps every PLC memory address to its label (e.g., WG_WERKSTUECK_ZAEHLER). Share this file with support to quickly identify the correct part counter address for your machine.
Before Contacting Support:
- Note the Heidenhain control type and model (iTNC 530, TNC 640, or TNC 730)
- Verify connectivity option is installed:
- TNC 640/730: Check for Option 56 (recommended) or Option 18
- iTNC 530: No option required
- Document IP address and network configuration
- Note PLC WORD address used for part counting (if applicable)
- Capture screenshots of configuration screens
- Document any error messages from control or MachineMetrics
Information to Provide:
- Machine make, model, and control type (iTNC 530 or TNC 640)
- Network configuration (IP address, subnet, gateway)
- PLC WORD address for part counter (if known)
- Adapter configuration (YAML)
- Description of issue and troubleshooting steps already taken
- Screenshots of error messages or configuration screens
For Part Counting Issues:
- Provide PLC WORD table screenshot showing counter location
- Note M-codes used in programs (if applicable)
- Describe expected vs actual part counting behavior
- Include machine builder name (Hermle, DMG Mori, etc.)