Mitsubishi Control Setup
The Mitsubishi NC takes its network settings as parameters, not as a settings screen. Set #1925 to #1928, then reboot the control — the changes do not take effect until you do.
Connect to: the Ethernet port on the control · Port: 683, fixed · Licence required: none
Step 1: Access Network Settings
- Press SYSTEM button on control panel
- Navigate to Network or Ethernet settings
- Depending on control version, may be under:
- SYSTEM → Network
- Parameter → Ethernet
- Setup → Communication
Step 2: Set IP Address
Before establishing a network connection, verify and configure the following CNC parameters:
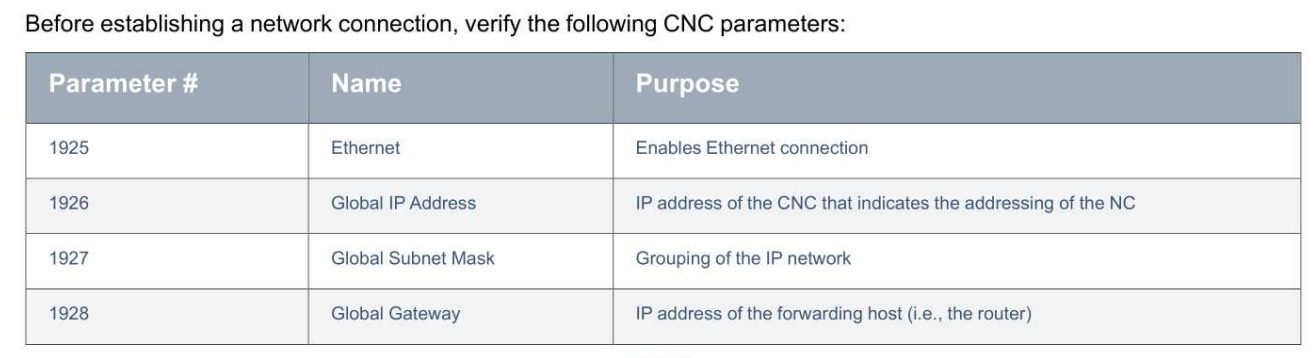
| Parameter # | Name | Purpose |
|---|---|---|
| 1925 | Ethernet | Enables Ethernet connection |
| 1926 | Global IP Address | IP address of the CNC that indicates the addressing of the NC |
| 1927 | Global Subnet Mask | Grouping of the IP network |
| 1928 | Global Gateway | IP address of the forwarding host (i.e., the router) |
Configuration Example:
- Parameter 1925 (Ethernet): Set to
1(enabled) - Parameter 1926 (IP Address): Enter static IP (e.g.,
192.168.1.100) - Parameter 1927 (Subnet Mask): Usually
255.255.255.0 - Parameter 1928 (Gateway): Your network gateway IP (e.g.,
192.168.1.1) - Port: Uses port
683(standard for Mitsubishi)
Important: If the network connection doesn't work after setting these parameters, reboot the control for the changes to take effect.
Step 3: Enable Communication
- Enable Ethernet communication if disabled
- Set communication protocol to allow external access
- No additional protocol licenses typically required
Step 4: Verify Connection
- Note the IP address you configured
- From a computer on the same network, ping the machine:
ping 192.168.1.100 - Should receive replies confirming network connectivity
Related Articles
- MachineMetrics Setup — adding the machine once it is on the network
- Troubleshooting — when the control will not answer